Showing posts with label musical crafts. Show all posts

Saturday, May 3, 2014

Father's Day Musical Massage Shirt Craft

DIY Back Massage Shirt- Musical Massage from Lalymom #

Here's a fun Father's Day gift idea Dad and the kids will love. Print drums and a keyboard on the back of a white T-shirt an let the kids take turns playing and giving Dad a massage. This is similar to the race track T-shirt  idea. Visit the site below for more.

LalyMom

Thursday, August 15, 2013

10 Fun Musical Crafts for Kids


There are 2 things kids love making; crafts and noise. So get the best of both worlds with this round-up list of 10 great musical kids crafts that they can really play. You'll find a variety of fun musical instruments to make. 

1. Tissue Box Guitar Craft

Little Learners Lounge

2. Toilet Roll Kazoo Music Craft

That's What She Said

3. Easy Trumpet Music Craft

Bible Story Hour

4. Trumpet/Bugle Music Craft

Concordia Congregation

5. Water Bottle Shaker Craft

Preschool Crafts for Kids*

6. Tambourine Paper Plate Music Craft

All Kids Network

7. Paper Plate Banjo Music Craft

Le Top Blog

8. Native American Shaker Craft
Preschool Crafts for Kids*

9. Rain Stick Music Craft
Teach Kids Art

10. Recycled Tin Can Drum Craft

Make and Takes

Search this site for even more great craft ideas.

Sunday, March 24, 2013

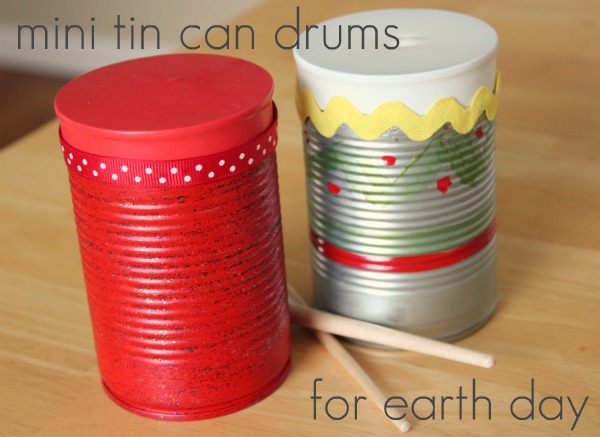
Earth Day Recycled Tin Can Drum Craft


Make some music for Earth Day this year with these cute tin can drums. This is a great recycled craft activity for Earth Day. Make and Takes is one of my favorite sites. They have such great ideas. Follow the link for the tutorial on this creative craft.

Make and Takes

Sunday, July 15, 2012

Peanut People Drum Puppet Craft


Here's a cute Japanese craft idea. Make these peanut drum puppets from a paper bag on a chopstick or skewer.

Materials:

  • chopsticks or bamboo skewers
  • small paper lunch bag
  • old newspaper or cotton
  • tape
  • brown marker
  • string
  • plastic bottle caps

Directions:
  1. Stuff old newspaper or cotton into a small paper lunch bag. Pinch and tape the top of the head so it stands up. Pinch the bag in the middle into a peanut shape.
  2. Stick onto a chopstick or skewer and tape the bottom.Decorate with a marker to look like a peanut with eyes and a mouth. You could also cut and paste on the face.
  3. Tie 2 short lengths of string to the peanut. Tape bottle caps to the other ends for hands.
  4. When you twist the peanut puppet, the bottle cap hands hit the body like the drum from the Karate Kid 2.
Banchan

Friday, July 6, 2012

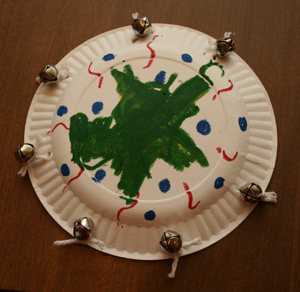
Paper Plate Tambourine Music Craft


This is a simple and fun paper plate tambourine music craft you can  do anytime.

Materials:

  • 2 paper plates
  • paints/markers
  • hole punch
  • gold pipe cleaners
  • jingle bells


Directions:
  1. Decorate 2 paper plates with paint or markers however you like.
  2. Sandwich the paper plates together and punch 5 holes through them around the rim.
  3. Loop 5 jingle bells on short lengths of gold pipe cleaner and tie the 2 paper plates together.
  4. Shake your tambourine and make some music.


Plastic Bottle Shaker Music Craft


Here's a simple and fun plastic bottle shaker craft.

Materials:

  • plastic drink bottles with cap(washed and dried)
  • colorful tissue paper
  • raw pasta, beans, or rice
  • glue
  • construction paper scraps
  • craft punches or stickers
  • plastic streamer tape

Directions:

  1. Cover plastic bottle in glue and wrap in the tissue paper color of choice.
  2. Glue on  shapes punched from colorful construction paper. Or use stickers.
  3. Put some raw pasta, beans, or rice into the bottle. Screw on the cap.
  4. Tie a length of colorful plastic streamer tape around the top. Tear the ends.
  5. Shake your shaker.

Sunday, June 17, 2012

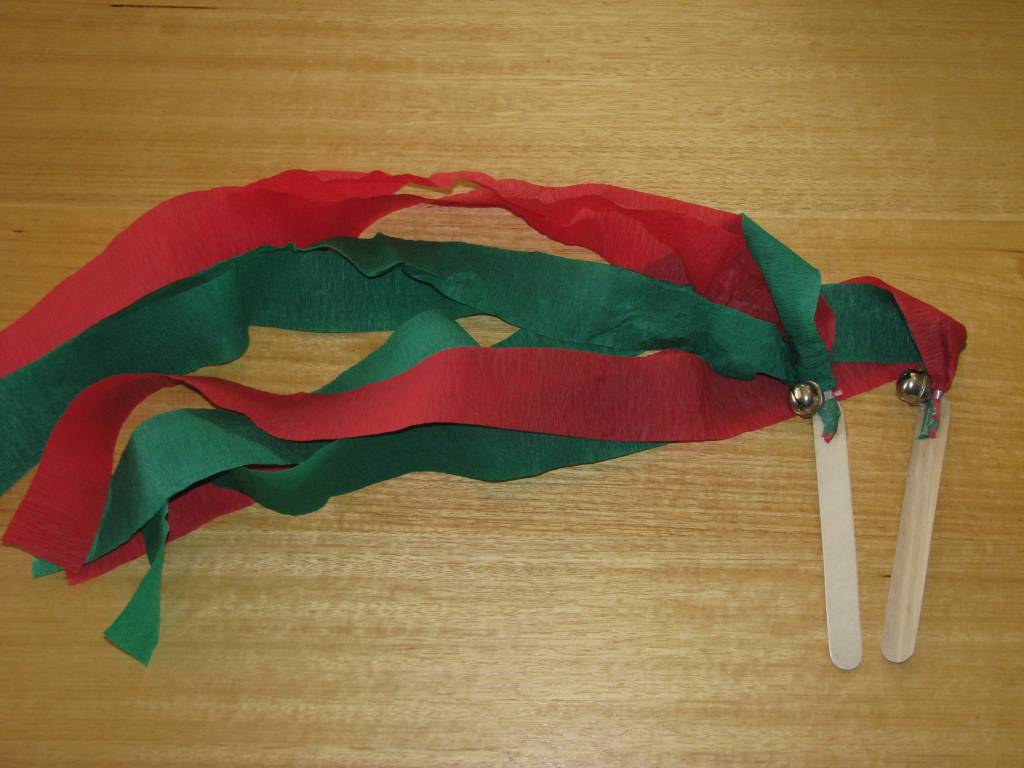
Christmas Streamers Craft


These cute and easy Christmas streamers are perfect for dancing to bring in the holiday season.

Materials:

  • red and green streamers
  • tape
  • string or pipe cleaner
  • jingle bells
  • Popsicle sticks or tongue depressors

Directions:

  1. Cut 2 streamers each of green and red about 24 inches(60 cm) long.
  2. Tape the ends of the streamers together like the end of a shoe lace.
  3. Thread the jingle bell on a piece of string or pipe cleaner. Tape to the Popsicle stick.
  4. Tape the ends of the streamers around the top of the Popsicle stick.
  5. Dance to your favorite Christmas songs.
 Source: Learning 4 Kids

Tuesday, June 12, 2012

Water Bottle Shaker Craft

Here's a colorful and quieter variation on the typical bead bottle shaker craft. Add water to make a water bottle shaker craft. It's more interesting to watch and most importantly, easier on parents ears.


Materials:

  • plastic water bottle with cap
  • water
  • beads
  • markers


Directions:

  1. Wash and dry the bottles.
  2. Decorate the outside with markers. Draw trees, flowers, fruit, rainbows, whatever you like.
  3. Fill bottle about 1/3 the way with water.
  4. Add some beads.
  5. Screw on the cap.
  6. Shake and watch the beads splash and dance around.


Friday, June 8, 2012

Native American Rattle Craft

This is a great-looking Native American (suspension) rattle craft you can make from a "y" shaped stick. This is fun for learning about other cultures or music. There's also a great video below. Te tutorial starts about half-way.

Materials:
  • "Y" shaped stick
  • yarn
  • scissors
  • tape
  • craft feathers
  • rattle objects: beads, washers, shells with a hole, etc.


Directions:

  1. Wind the "Y" shaped stick entirely in yarn and tie off. Tie a few feathers to the ends.
  2. String some yarn between the "Y". Thread on rattle materials like washers and beads. Tie the other end.
  3. Make native American inspired music with your rattle.


Source: Enchanted Learning


Sunday, June 3, 2012

Paper Plate Tambourine/Shaker Music Craft


This is a fun and easy tambourine/shaker craft made from paper plates. It's similar to the Valentine's Day Shaker craft I posted before.

Materials:

  • 2 paper plates
  • crayons, markers
  • tissue paper squares
  • dry beans or popcorn
  • glue
  • hole punch
  • yarn
  • tape

Directions:

  1. Use crayons or glue on scrap pieces of paper to decorate 2 paper plates.
  2. Stack the paper plates and punch holes about every 1.5 to 2 inches all the way around both rims.
  3. Put one paper plate face up and put some dry beans or popcorn.
  4. Pipe glue all the way around the edge and sandwich the other paper plate on to so the holes line up. Allow to dry.(optional)
  5. Cut a piece of yarn about 3 feet long. Wrap one end with a little scotch tape to make threading easier.
  6. Thread the yarn through one set of holes and around the other side to the next set and so on all the way around the rim. Pull taunt, tie a knot around the end, and cut off the excess.
  7. Shake your tambourine/shaker.
source: Crafts with Kids

Saturday, June 2, 2012

Tambourine Paper Plate Music Craft

This is a simple tambourine music craft you can make from a paper plate. It's a great addition to your kids grown collection of musical instrument crafts.
Materials:
  • paper plate
  • crayons or markers
  • hole punch
  • jingle bells
  • yarn or string
Directions:
  1. Let kids decorate the back of the paper plate however they like.
  2. Punch holes around the rim.
  3. Cut short lengths of string about 3 inches long. Thread onto the jingle bells and tie through the holes in the paper plate.
  4. Beat your tambourine.
 Source: All Kids Network

Rain Stick Music Craft 4 (Sensory Bottle)


This rain stick bottle craft idea is so great. It's the easiest rain stick to make and you can enjoy watching it, too.The key to make it work is using the smallest grains or seeds possible. Most rain stick crafts use corn or rice, but these are too big. The bottle pictured here used quinoa and amaranth.

Rain Stick Music Craft 3

Making a Native American rain stick craft is a great musical idea. It 's not only fun, but helps teach kids about other cultures. Authentic rain sticks have little spines inside that slow and change the sound of the beans as they fall down. The basic construction of a kids rain stick is the same, using a paper towel roll or other cardboard tube, but I'm offering a few different variations. The difference is what you put on the inside. You can choose the one that is best for you.

Variation 3

This is the most difficult version, but also the most authentic as to how real rain sticks are made. Put toothpicks or skewers inside. The beans or rice hit them as they fall, creating a rain sound. I've seen other rain sticks that use nails or screws. Personally, I think this is a little bit dangerous. It's important to cover up the holes on the outside with dot stickers or paper.

Materials:

  • paper towel roll or cardboard tube
  • toothpicks or skewers
  • dry beans, rice, or corn
  • wire cutters
  • pencil
  • pushpin
  • dot stickers
  • glue
  • colorful paper or other decorating materials
  • scissors
  • rubber bands

Directions:

  1. Before you start, mark your cardboard tube with a pencil where the holes will go. You can follow the natural spiral line of the tube.
  2. Start holes with a pushpin. Roll the pin around to make the hole bigger.
  3. Push toothpicks or skewers into all the holes. add a drop of glue into each hole.
  4. Cut the excess off the toothpicks on the outside with wire cutters. Make them flush(as possible).
  5. Add some glue to one end of the tube, wrap paper or wax paper around the end, and secure with a rubber band.
  6. Put dry beans into the tube.
  7. Close the other end.
  8. Decorate the outside of the tube with paper. You might want to cover all the holes with dot stickers first. You cold also cut a sheet of paper to wrap around the tube, decorate it first, then glue around the tube.
Source: The Jewish Muslimah

Rain Stick Music Craft 2

Making a Native American rain stick craft is a great musical idea. It 's not only fun, but helps teach kids about other cultures. Authentic rain sticks have little spines inside that slow and change the sound of the beans as they fall down. The basic construction of a kids rain stick is the same, using a paper towel roll or other cardboard tube, but I'm offering a few different variations. The difference is what you put on the inside. You can choose the one that is best for you.

Variation 2:

This rain stick is really original idea and is much easier alternative to placing toothpicks inside. Use a spiral of aluminum foil to affect the sound of the falling beans.

Materials:

  • paper towel roll or cardboard tube
  • colorful tissue paper
  • aluminum foil
  • dowel rod
  • wax paper
  • dry beans, rice, or corn
  • glue
  • rubber bands
  • scissors

Directions:

  1. Take a long piece of aluminum foil and roll it into a long tube.
  2. Wrap the aluminum foil tube around a dowel rod to make a spiral shape and remove from the rod.
  3. Add a little glue around one end of the paper towel roll and wrap a square of wax paper around the end and secure with a rubber band.
  4. Cut to length and put the spiral inside the paper towel roll.
  5. Place dry beans inside the tube.
  6. Wrap and secure the other end.
  7. Cut tissue paper into squares.
  8. Spread glue around the tube and stick the squares all over, cover completely.
  9. Tie a little tissue twine around each end.
  10. Turn your stick and bring the rain
Source: Craft Jr.

Rain Stick Music Craft 1

Making a Native American rain stick craft is a great musical idea. It 's not only fun, but helps teach kids about other cultures. Authentic rain sticks have little spines inside that slow and change the sound of the beans as they fall down. The basic construction of a kids rain stick is the same, using a paper towel roll or other cardboard tube, but I'm offering a few different variations. The difference is what you put on the inside. You can choose the one that is best for you.

Variation 1

This is the simplest rain stick. There is nothing inside, but dried beans, rice, corn, or seeds. It's little more than a shaker. You can decorate the outside anyway you like, with crayons, markers, scraps of paper, etc. The best idea I saw was wrapping the outside with crumples brown paper and coloring lines or simple shapes and adding some feathers. It has a really nice, woody, Native American look to it.

Materials:

  • paper towel roll or cardboard mailing tube
  • cardboard or cereal box
  • dry rice, corn, or beans(rice sounds best)
  • brown paper
  • markers
  • twine
  • feathers
  • beads
  • scissors
  • glue

Directions:

  1. Trace the end of the cardboard tube twice on an old cereal box. Cut out the circles. These will be the caps for the ends.
  2. Cut 2 square of brown paper and glue the circles on the center. Alternatively, you could use thick brown tape.
  3. Cut a piece of brown paper to roll around the tube. Decorate with lines and simple shapes. Crumple up the paper and smooth it out a few times.
  4. Spread glue around one end of the tube. Place one cap over the opening and fold down the paper and hold in place.
  5. Put rice or beans of choice into the tube.
  6. Glue on the other cap.
  7. Put glue on the tube and roll the paper around it.
  8. Tie a piece of twine around each end with long tails
  9. Thread a few beads on the twine and tie the end in a knot.
  10. Use tape, glue, or rubber bands to attach feathers to the twine.

Source: Teach Kids Art

Thursday, May 31, 2012

Easy Trumpet Music Craft

This is an easy trumpet music craft you can make from some paper and a toilet paper roll. Looks great!

Materials:

  • toilet paper roll
  • yellow or gold paper
  • scissors
  • glue
  • 3 buttons

Directions:

  1. Trace and cut out 2 funnel shaped pieces from yellow or gold paper. The long part should match the length of the toilet paper roll.
  2. Glue the 2 pieces around the toilet paper roll and glue the ends together to make a 3D horn shape.
  3. Glue on 3 buttons on the top.
Thanks to Tessa and her lovely daughter for the pic. Check out her great site below.
Source: Bible Story Hour

Trumpet/Bugle Music Craft


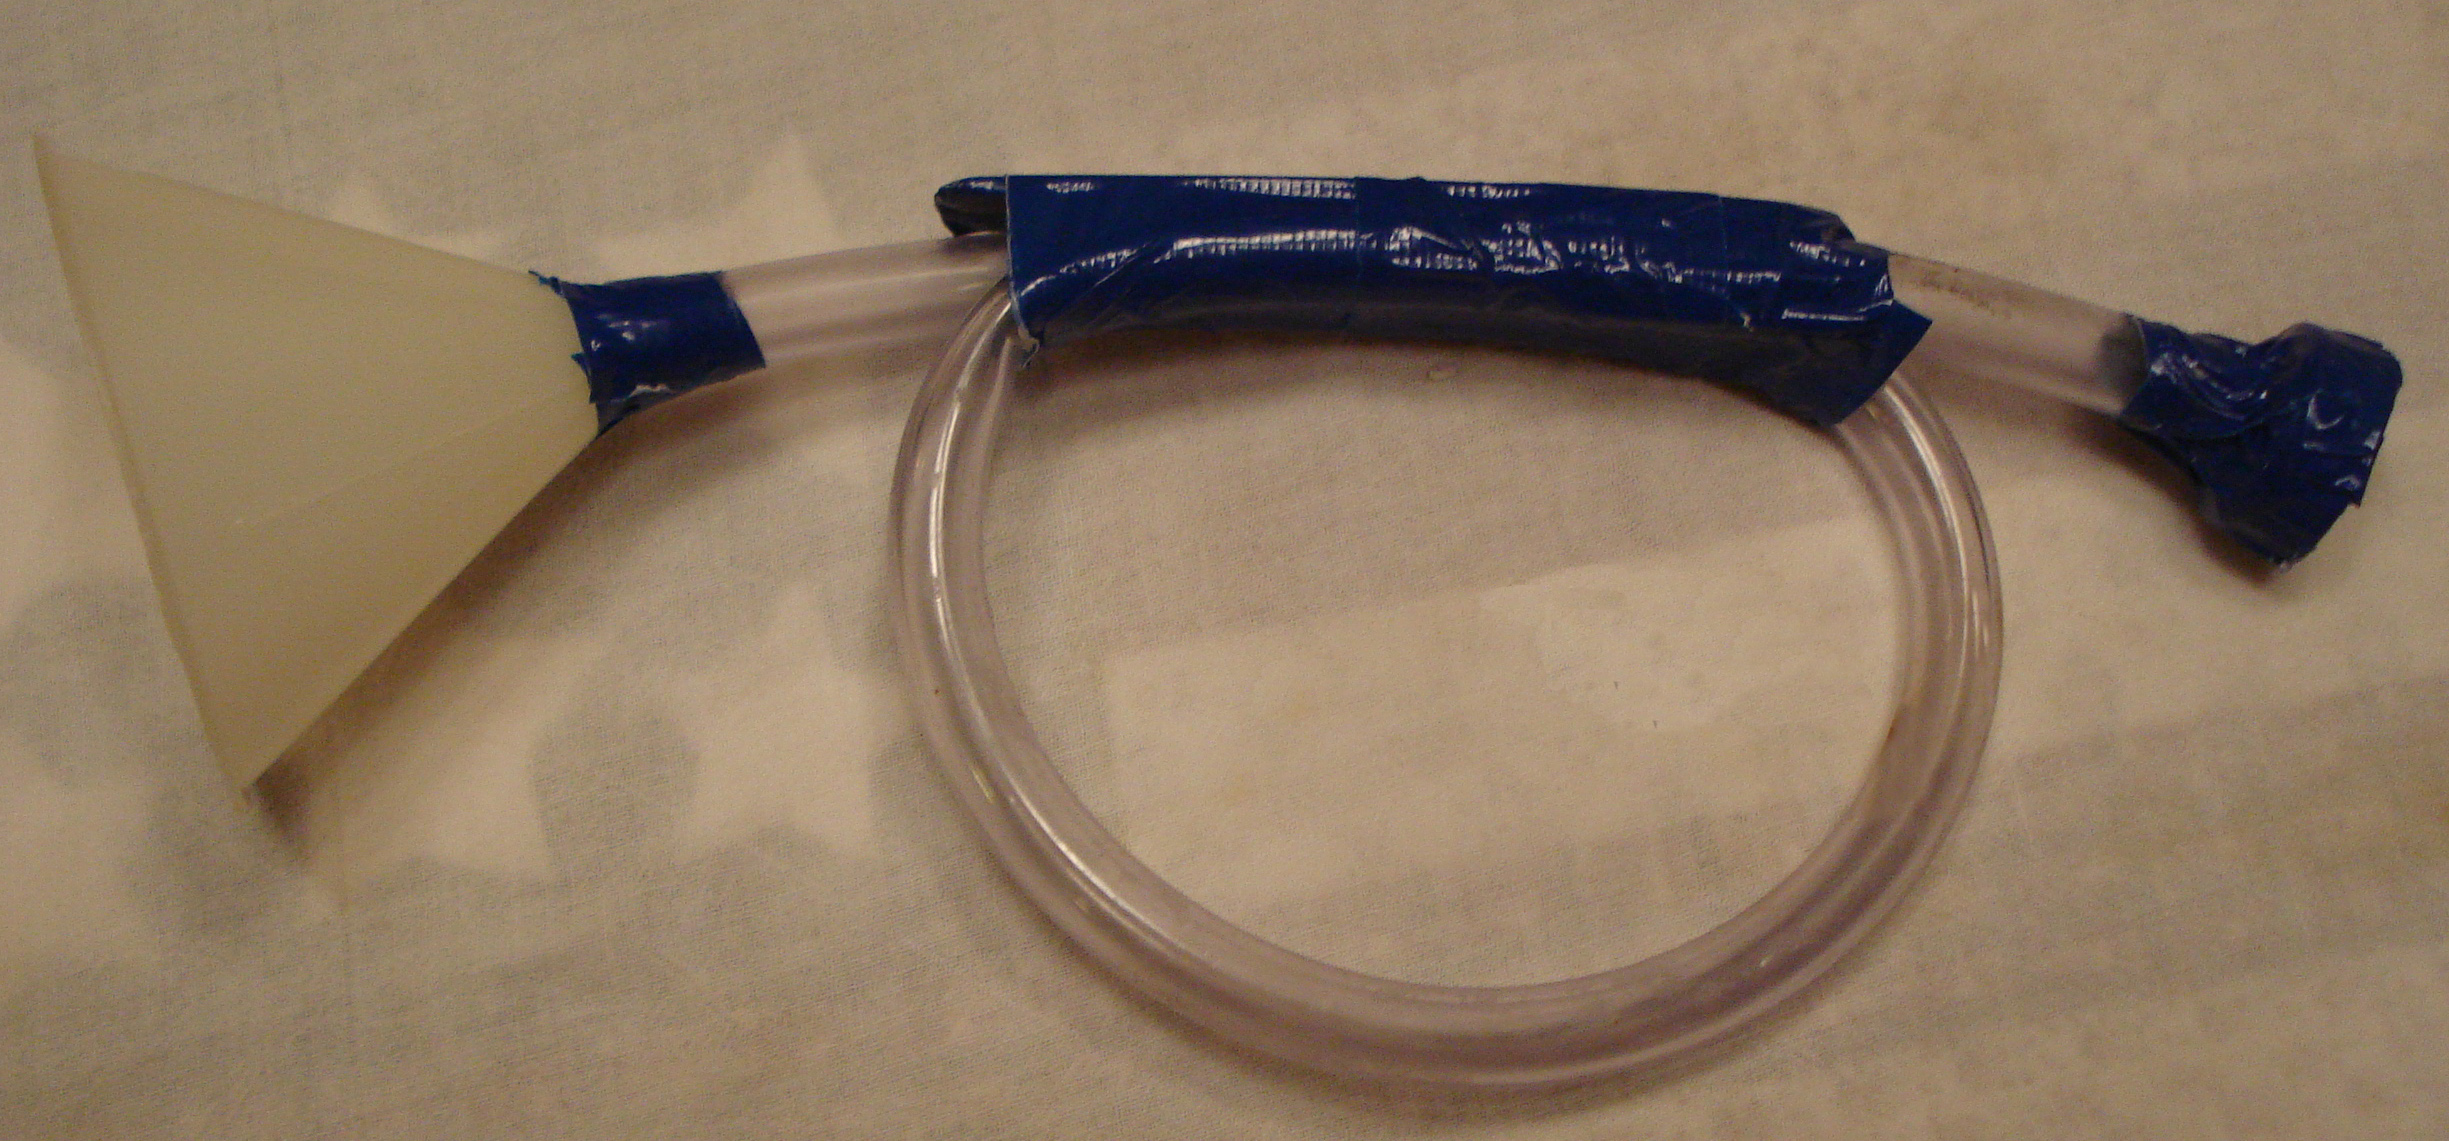
The original inspiration for this craft was Gideon from the Bible. This is "Gideon's Trumpet" as he leads his army to victory against the Midianites. But it could just as easily be a bugle.

Materials:

  • 1/2" hose about 24" long
  • small funnel
  • large craft stick
  • colored duct tape
  •  wide screw on plastic cap(like from a wide mouth juice bottle)
  • scissors
  • electric drill
  • gold spray paint(optional)


  • Directions:

    1. Have an adult drill a 1/2 inch hole through the middle of the plastic cap .
    2. Stick the funnel into the hose and secure with tape.
    3. Stick the plastic cap over the other end and secure with tape to make the mouthpiece.
    4. Loop the hose into a bugle shape. Attach a craft stick and tape in place.
    5. Spray paint the whole thing gold for a professional look.
     Source: Concordia Congregation

    Toilet Roll Kazoo Music Craft

    The simplest ideas are the best. The simple toilet paper roll kazoo craft only takes minutes, but will entertain the kids for hours.(whether you like it or not)

    Materials:

    • toilet paper roll
    • wax paper
    • rubber bands
    • scissors
    • crayons, stickers
    • white paper and glue(optional)

    Directions:

    1. Decorate the outside of your toilet paper roll. It might look better if you cover you roll in white paper first and then color. Add stickers if you want.
    2. Cut a circle from wax paper.
    3. Tie the wax paper over one end of the toilet roll with a rubber band.
    4. Play your new kazoo!
    Source: That's What We Said

    Tissue Box Guitar Craft

    This tissue box guitar craft is a classic that never gets old. Simple and fun to play.

    Materials:

    • tissue box
    • rubber bands
    • paper towel roll
    • scissors
    • tape

    Directions:

    1. Wrap some rubber bands around an empty tissue box.
    2. Cut one inch slits around one end of the paper towel roll and flatten out.
    3. Tape the flat end to the end of the box for a handle. Rock on!

    Variations:

    1. If your box doesn't already have a pretty pattern, decorate the outside with stickers or scraps of paper.
    2. For a more professional look, trace the end of the paper towel roll on the end of the box, cut out., and insert the roll for a handle.
    3. The simplest guitar of all doesn't need a handle.
    Source: Little Learners Lounge

    Paper Guitar/Banjo Shapes Craft

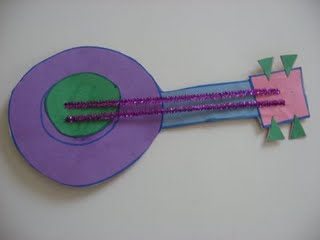
    This simple guitar/banjo craft is made from various shapes.

    Materials:

    • construction paper
    • cereal box
    • marker
    • scissors
    • pipe cleaners
    • glue
    • tape

    Directions:

    1. Draw the following shapes on various colored construction paper and cut out; 1 large circle(body), 1 smaller circle(center), 1 rectangle(neck), 1 square(head), and 4 small triangles(tuning knobs).
    2. Glue the pieces together on the inside of an old cereal box and allow to dry.
    3. Cut out the banjo.
    4. Poke 2 holes in the head and in the center circle and thread 2 shiny pipe cleaners through for strings. Tape the pipe cleaners in place on the back.

      
    Source: No Time for Flash Cards

    Submit your craft! Do you have a great craft tutorial or idea you want to share and reach a wider audience? Visit my Submit page and my new, easy-to-use submission form.

    Related Posts Plugin for WordPress, Blogger...